Coreboot on the ASRock E3C246D4I

A new toy to play with OpenBMC

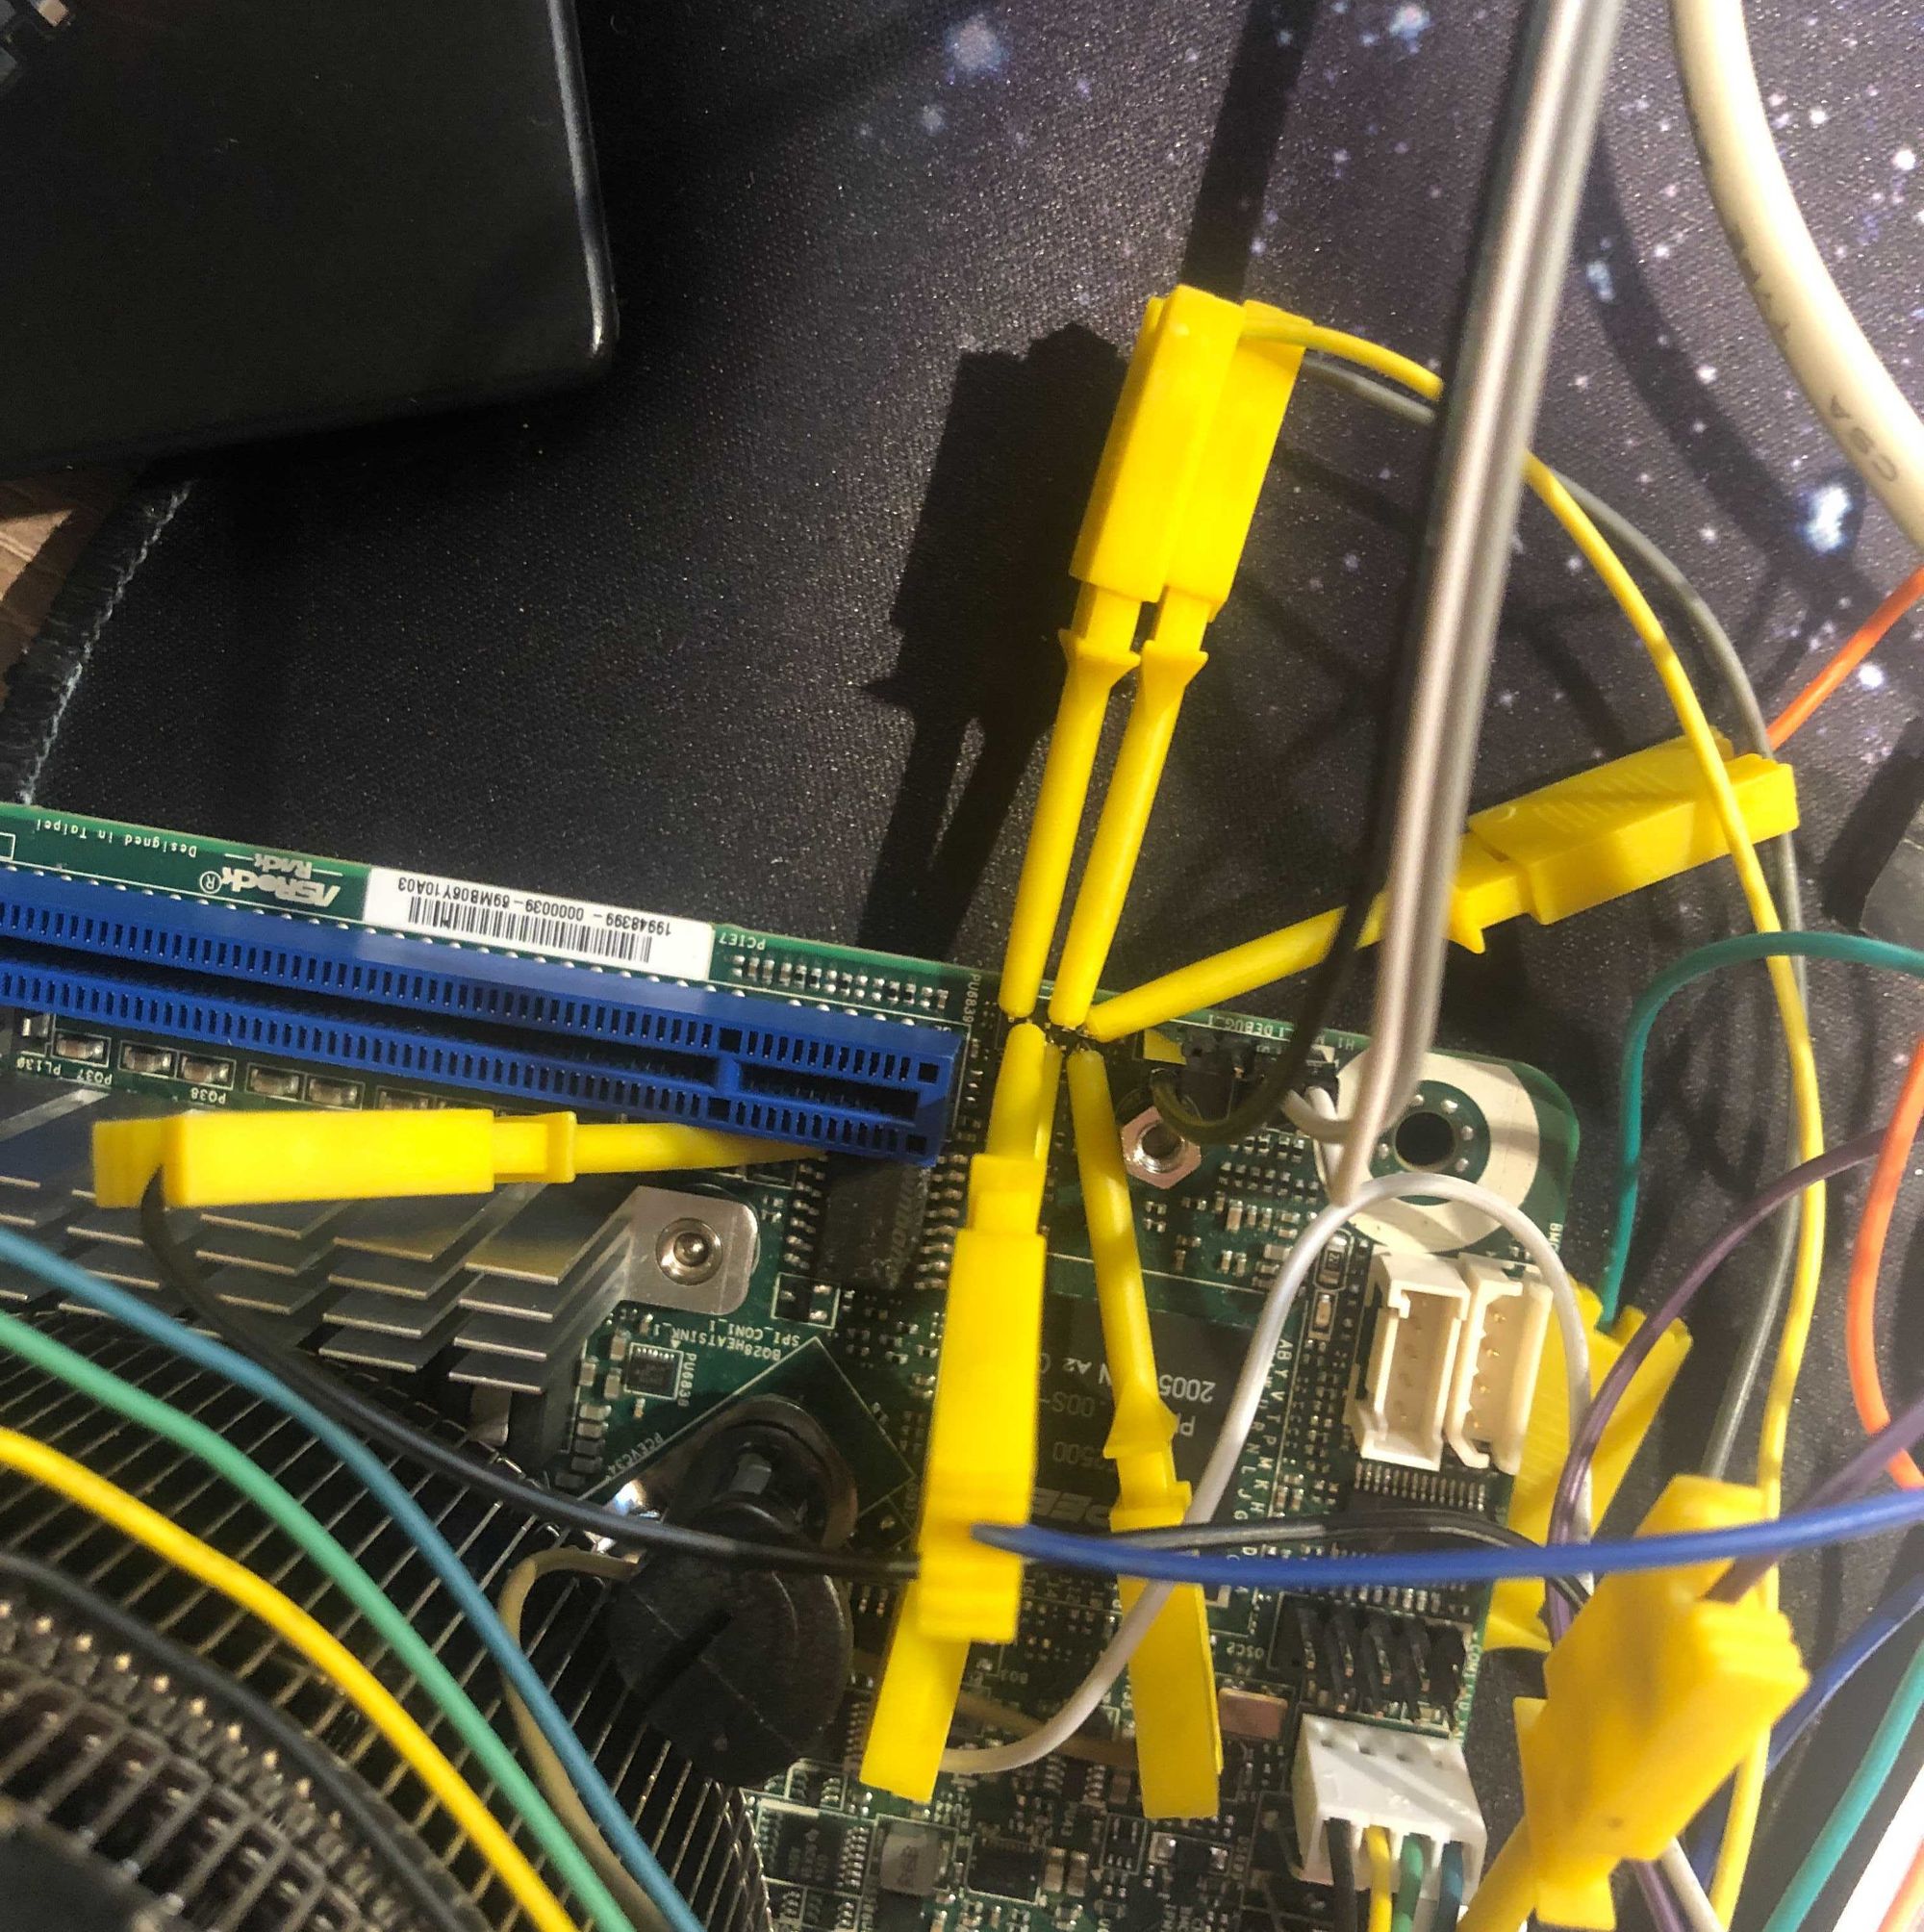
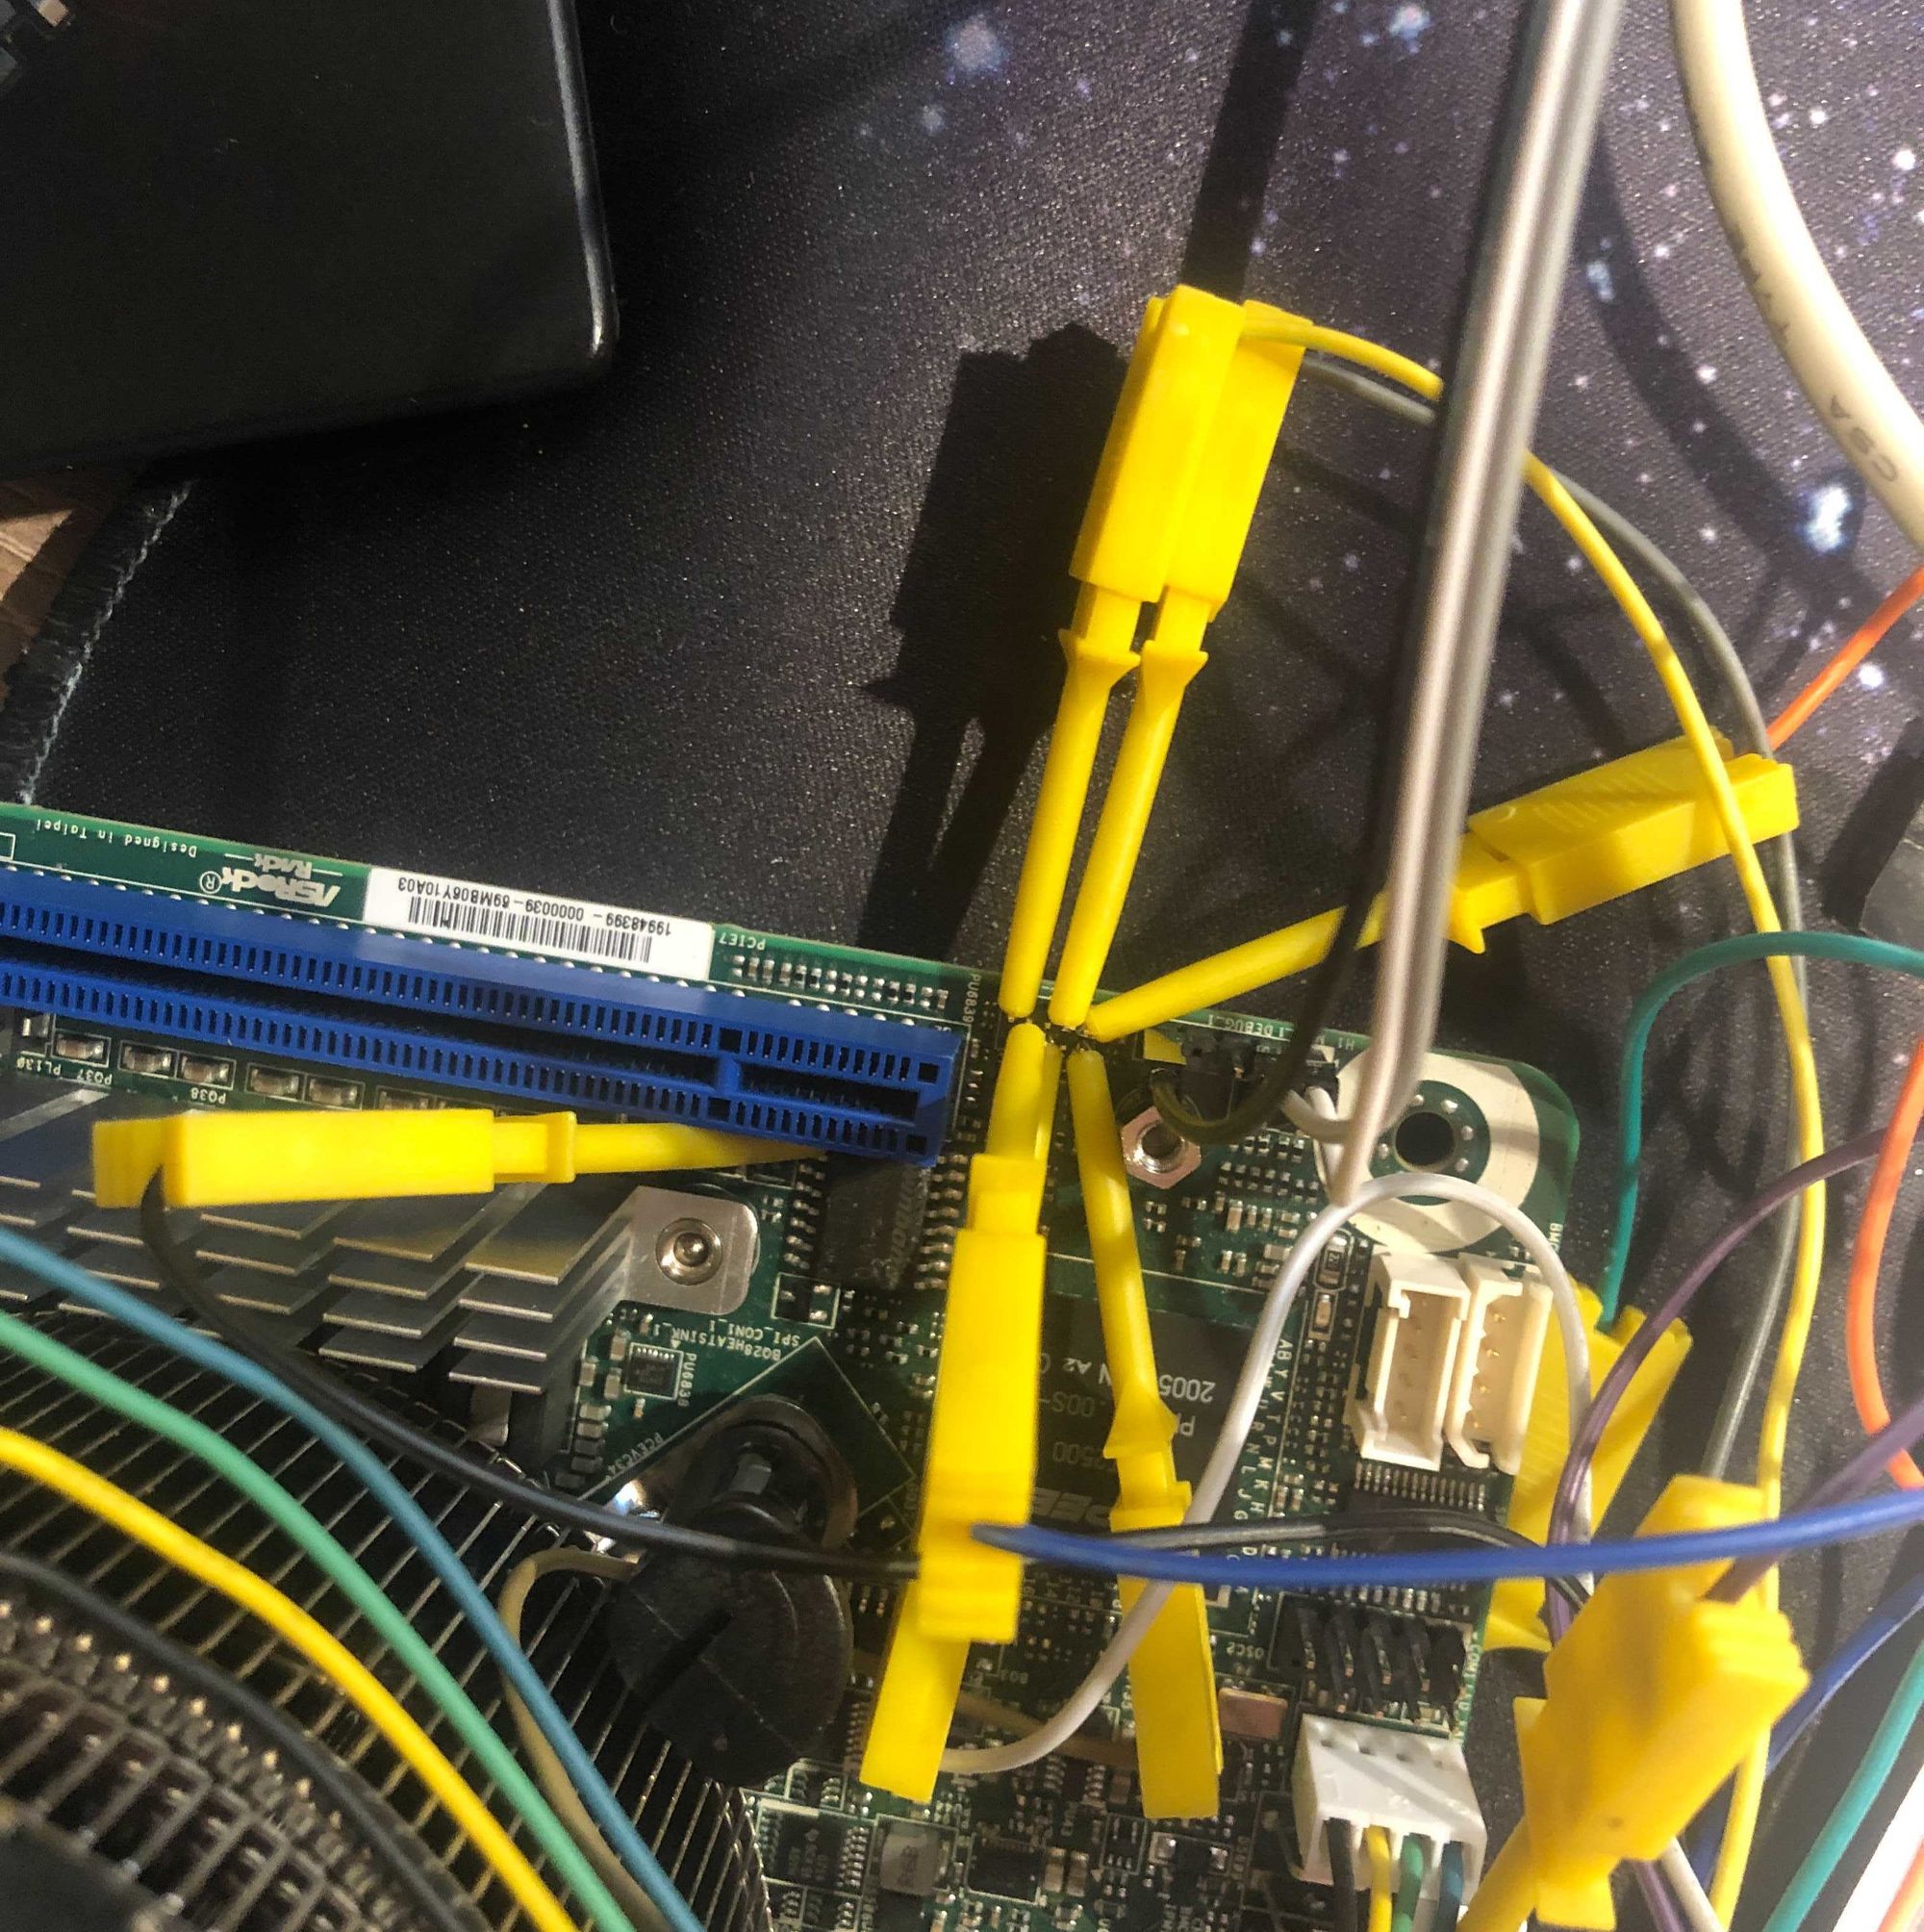
Coreboot on the ASRock E3C246D4II wanted to play around with OpenBMC on a physical board and this article led me to the ASRock E3C246D4I. It's a not overly expensive Intel Coffee Lake board featuring an Aspeed AST2500 BMC. So the first thing I did was to compile OpenBMC. My computer was in for a quite a chore there. It needed to download 11G of sources and compile those. Needless to say this takes a long time on a notebook computer and is best done overnight. I flashed the image via the SPI header next to the BMC flash. I used some mini crocodile clips to do this at first. Coreboot on the ASRock E3C246D4I To set up a nice way to play around with OpenBMC I attempted to hook up an EM100Pro, a flash emulator via the header. This did not seem to work. I'm not sure what was going on here. It looked like the real flash chip was not reliably put on HOLD by the EM100. When tracing the SPI commands with the EM100 0xff was the response to all the (fast)read commands. I guess a fast SPI programmer will do for now in the future. OpenBMC makes updates quite easy though: just copy the image-bmc to /run/initramfs/ and rebooting will launch an update which takes a minute or so (faster than my external programmer). So what can OpenBMC do on that board? Not much, it seemed at first. Powering the board on and off did not work and not much else either. The author of the port, Zev Zweiss, helped me a lot to get things working though. A bit of manual gpio magic and powering on and off works well. So the upstream code needs a bit of polish to get working but using the branch from the original author of this board port fared much better: sensors and power control work fine. Fan control is not implemented though, but I might look into that. Max fan speeds might be ok in a datacenter but not in my home office for sure!

Coreboot

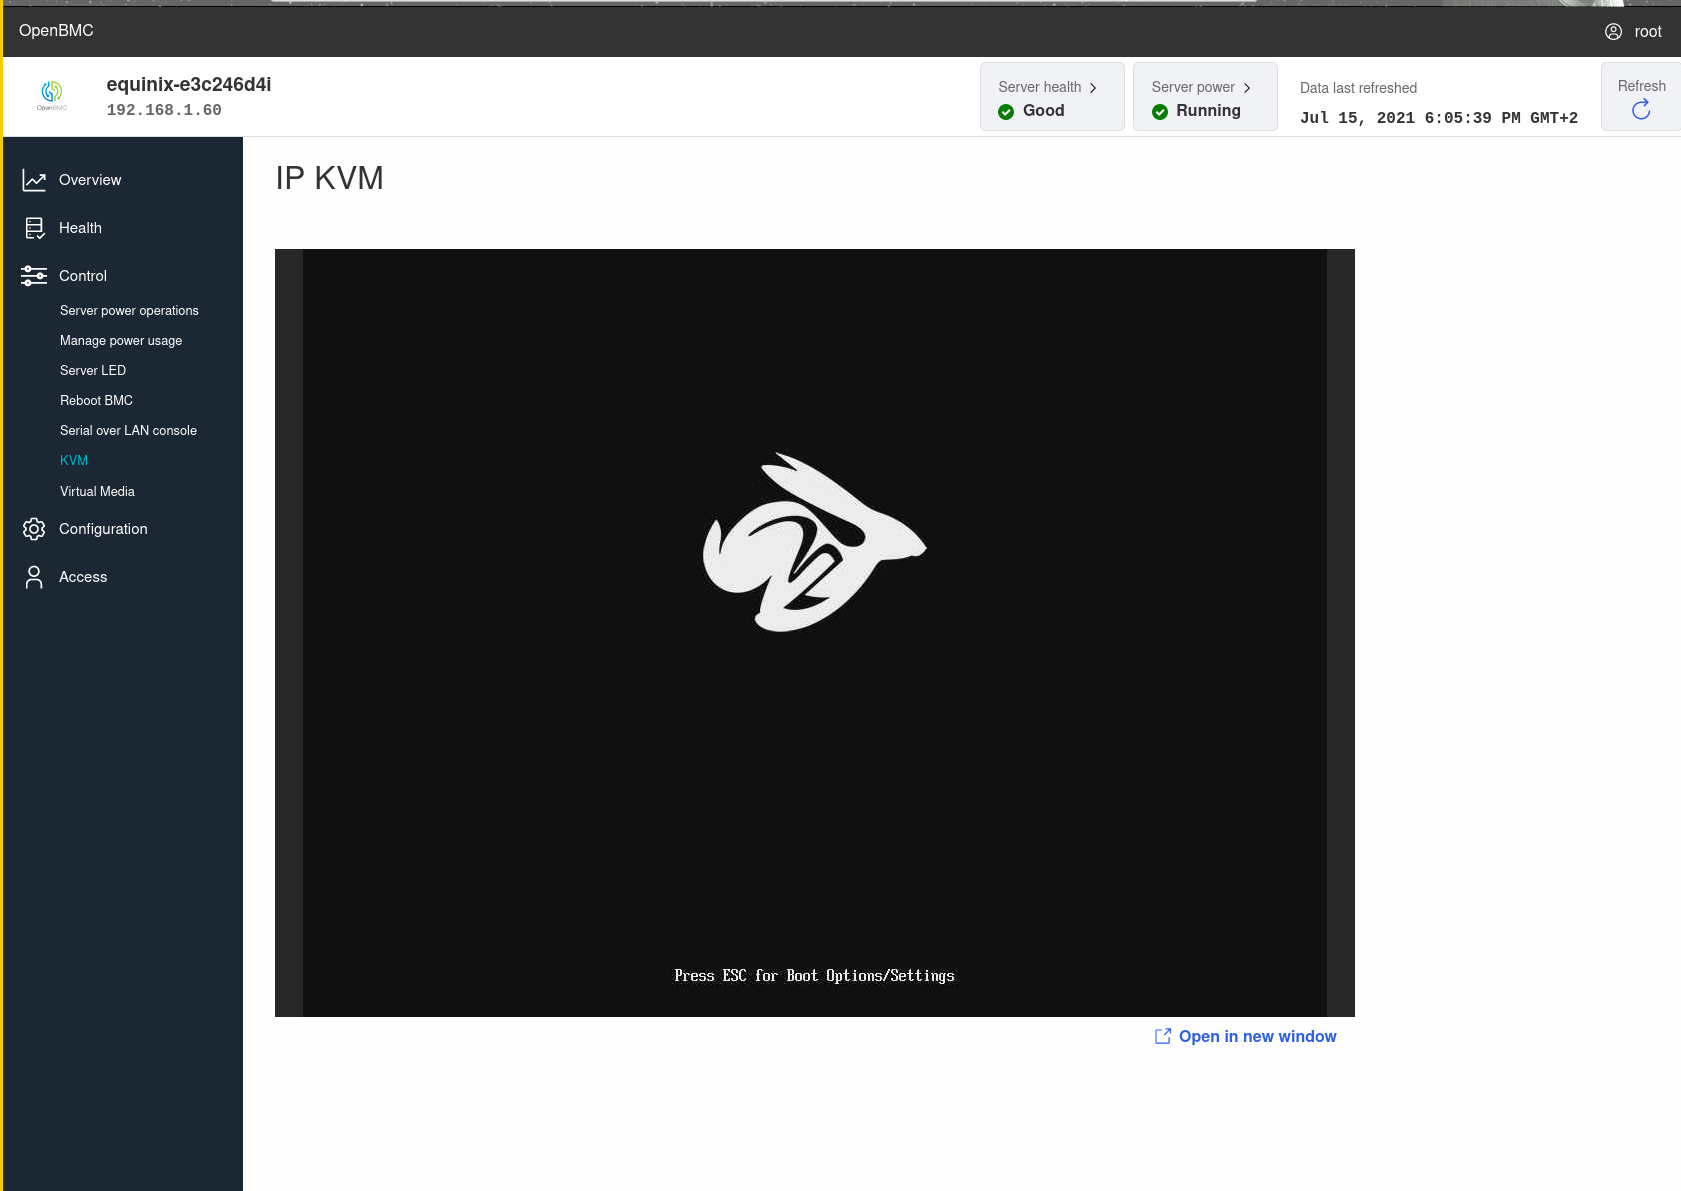
The host flash is muxed to the BMC SPI pins so the BMC can easily (re)flash the host firmware (and is even faster at this than the host PCH due to the high SPI frequency the BMC can use). To get that working a few things needed to be done on the BMC. The flash is hooked up to the BMC SPI1 master bus which needs to be declared in the FDT. U-boot needs to set the SPI1 controller in master mode. The mux is controlled via a GPIO. 2 other GPIOs also need to be configured such that the ME on the PCH does not attempt to mess with the firmware while we're flashing (ME_RECOVERY pins). A flash controlled by a BMC is a very comfortable situation for a coreboot developper, who needs to do a dozen reflashes an hour, so hacking on coreboot with this device was a bliss (as soon as I got the uart console working). I don't have the schematics to this board so I'll have to do with what the vendor AMI firmware has set up and decode it from the hardware registers. This worked well: there is a tool to generate the PCH GPIO configuration in util/intelp2m which outputs valid C code that can directly be integrated into coreboot. I build a minimal port based on other Intel Coffeelake boards and after fixing a few issues like the console not working and memory init failing, it seemed to have initialised all the PCI devices more or less correctly and got to the payload! The default payload on X86 with coreboot is SeaBIOS. It looks like this payload does not like this board very much though: it hangs in the menu. I never got to boot anything with it. Tianocore (EDK2) proved a much better match and was able to boot from my HDD attached via USB without any issues. Booting the virtual CD-ROM from the BMC also worked like a charm. Coreboot on the ASRock E3C246D4I You can find the code on gerrit. Most things like USB, the 10G NICs, BMC IP-KVM and BMC Serial on Lan are working with that code. What's next: Get a LinuxBoot payload working and write some public documentation on how to set things up for OpenBMC and coreboot for this nice board. Maybe I can also get u-bmc working on this board? A few seconds vs a few hours in compiletime does seem like a compelling argument.

Open source cache as ram with Intel Bootguard

FSP-T in open source projects

X86 CPUs boot up in a very bare state. They execute the first instruction at the top of memory mapped flash in 16 bit real mode. DRAM is not avaible (AMD Zen CPUs are the exception) and the CPU typically has no memory addressable SRAM, a feature which is common on ARM SOCs. This makes running C code quite hard because you are required to have a stack. This was solved on x86 using a technique called cache as ram or CAR. Intel calls this non eviction mode or NEM. You can read more about this here. Coreboot has support for setting up and tearing down CAR with two different codepaths:
  1. Using an open source implementation.
  2. Using a closed source implementation, using FSP-T (TempRamInit) and FSP-M (TempRamExit).
In coreboot the open source implementation is the most used one. For instance all Google chromeos platforms use it, so it's well tested. FSP is a propriatary binary provided by Intel that can be split up into 3 components: FSP-T (which is in charge of setting up the early execution environment), FSP-M (which configures the DRAM controller), FSP-S (further silicon init). With the FSP codepath in coreboot you call into FSP-T using the TempRamInit API to set up the early execution environment in which you can execute C code later on. This binary sets up CAR just like coreboot does, but also does some initial hardware initialisation like setting up PCIe memory mapped configuration space. On most platforms coreboot is fully able to do that early hardware init itself, so that extra initialisation in FSP-T is superfluous. After DRAM has been initialised, you want to tear down the CAR environment to start executing code in actual DRAM. Coreboot can do that using open source code. It's typically just a few lines of assembly code to disable the non-eviction mode that CPU is running in. The other option is to call FSP-M with the TempRamExit API. See FSP v2.0 spec for more information on TempRamInit and TempRamExit . Sidenote: running FSP-T TempRamInit does not necessarily mean you need to run TempRamExit, as it is possible to just reuse the simple coreboot code. This is done on some platforms to avoid problems with TempRamExit. It's generally a very bad idea to give up control of setting up the execution environment to external code. The most important technical reason to not do this, is because coreboot needs to be in control of the caching setup. When that is not the case you encounter all kinds of problems because that assumption is really baked in to many parts of the code. Coreboot has different stages: bootblock, romstage, ramstage and those are actually all separate programs that have their well defined execution environment. If a blob or reference code sets up or changes the execution environment, it makes proper integration much harder. Before Intel started integrating FSP into coreboot, AMD had a go at integrating their reference code, called AGESA into coreboot. Even though AGESA was not provided as blob but as open source code, it had very similar integration issues, for exactly this reason: it messed with the execution environment. As a matter of fact, Intel FSP v1.0 messed up the execution environment so badly that it was deemed fatally flawed. Support for FSP v1.0 was subsequently dropped from the coreboot master branch. So for technical reasons you want to avoid using FSP-T inside coreboot at all costs. From a marketting perspective FSP-T is also a disaster. You really cannot call coreboot an open source firmware project if even setting up the execution environment is delegated to a blob.

Open source cache as ram with Intel Bootguard

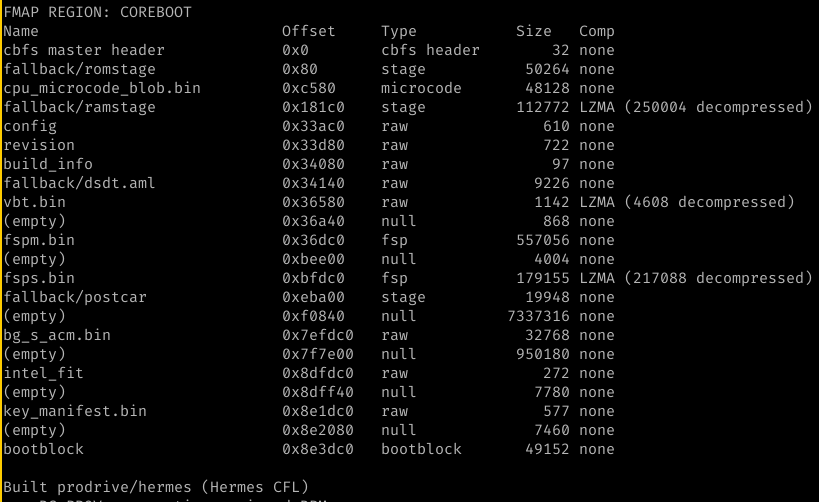
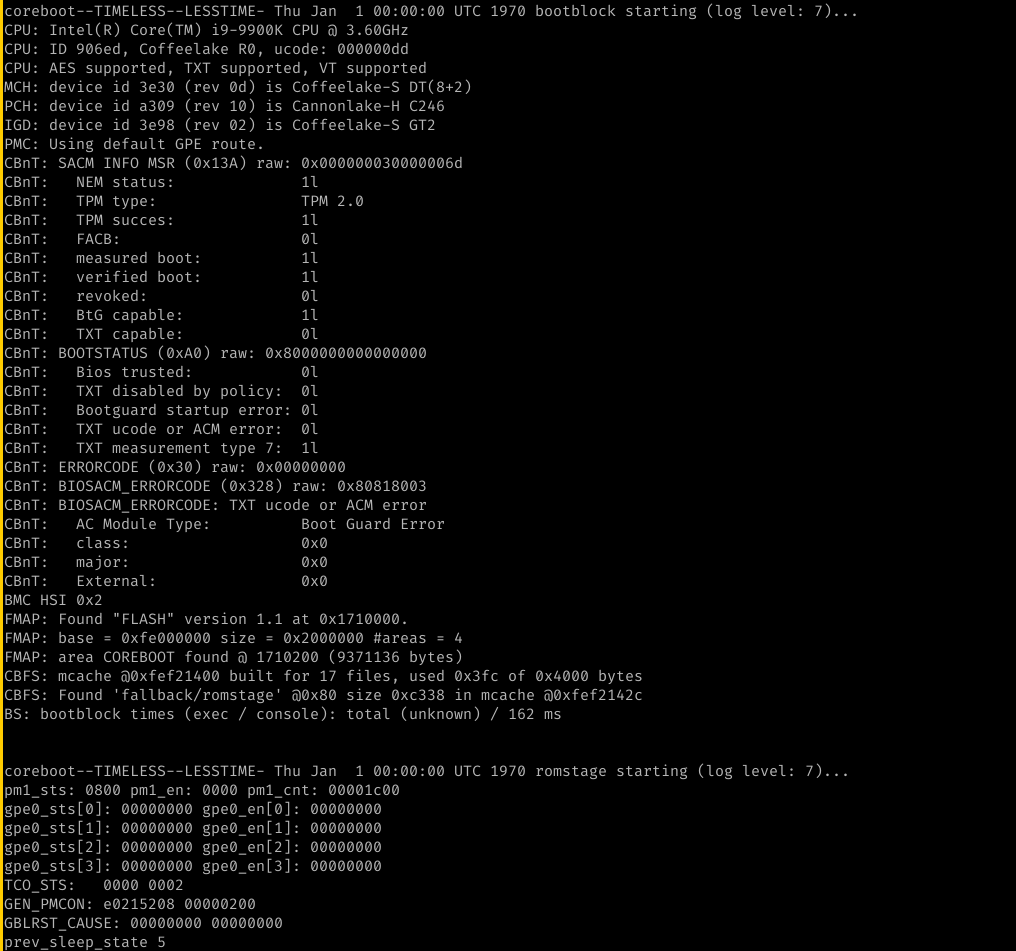
One of the reasons why there still is code to integrate FSP-T inside coreboot is for Intel Bootguard support. Here you can read more on our work with that technology. Open source CAR did not work when the Bootguard ACM was run before reset. So with Bootguard, the first instruction that is run on the main CPU is not the reset vector at 0xfffffff0 anymore. The Intel Management Engine, ME validates the Authenticated Code Module or ACM with keys owned by Intel. The ACM code then verifies parts of the main bootfirmware, in this case the coreboot bootblock, with a key owned by the OEM which is fused inside the ME hardware. To do this verification the ACM sets up an execution environment using exactly the same method as the main firmware: using NEM. The reason that open source cache as ram does not work is because the ACM did already set up NEM. So what needs to be done is to skip the NEM setup. You just want to set up a caching environment for the coreboot CAR, fill those cachelines and leave the rest of setup as is. Bootguard capable CPUs have a readonly MSR, with a bit that indicates if NEM setup has already been done by an ACM. When that is the case a different codepath needs to be taken, that avoids setting up NEM again. See CB:36682 and CB:54010. It looks like filling cachelines for CAR is also a bit more tricky and needs more explicit care CB:55791. So with very little code we were able to get bootguard working with open source CAR! Here you see no fspt.bin in cbfs: No fspt.bin in cbfs and here you see that bootblock is run with a working console and that romstage is loaded. This means that cache as ram works as intended. Console and Bootguard success! Cache as Ram without FSP-T worked
What's next?

Given that all Intel Client silicon now work with open source cache as ram including Bootguard support, there are no reasons to keep FSP-T as a supported option for these platforms. There are however still Intel platforms in the coreboot tree that require FSP-T. Skylake-SP, Cooperlake-SP and Denverton-NS depend on the other early hardware init that is done in FSP-T for which there is no open source equivalent in coreboot. This makes FSP-T mandatory on those platforms, for the time being. The advantages of being in control of the execution environment are overwhelming. From personal experience on working with the Cooperlake SP platform, we did regularly hit issues with FSP-T. Sometimes those were bugs inside the FSP-T code that had to be worked around. On other ocassions it was coreboot making assumptions on the bootflow that were not compatible with FSP being in control of the execution environment. I can firmly say that FSP-T causes more troubles than it actually solves, so having that code open sourced is the best strategy. We hope that by setting this good example with open source Bootguard support, others will be incentivised to not rely on FSP-T but pursue open source solutions.
Hardware assisted root of trust mechanism and coreboot internals

I started working for 9elements in October 2020 and my first assignment was to get Intel CBnT working on the OCP Deltalake using coreboot firmware. Intel Converged Bootguard and TXT is a hardware assisted method to set up a root of trust. In this blog post I will discuss some of the changes needed in coreboot to get this working. Setting CBnT up properly was definitely a challenge, but the work did not stop there. So while Intel CBnT provides a method to verify or measure the initial start-up code, it is not enough. You want to trust the code you run from start, the reset vector, to end, typically a bootloader. CBnT only takes care of the start. You have to make sure that each software component trusts the assets it uses and the next program it loads. This concept is called a chain of trust. Now in 2021 I have an assignment that involves supporting the older Intel Bootguard technology. Since Bootguard is very similar to CBnT, I'll also touch on that.

Intel Converged Bootguard and TXT: a root of trust

Intel CBnT merges the functionality provided by TXT and BtG in one Authenticated Code Module (ACM). This is a code module signed by Intel that runs on the main CPU before the traditional x86 reset vector is run at address 0xFFFFFFF0. The job of this ACM is to measure and/or verify the main firmware, depending on the 'profile' that has been set up in the Intel Management Engine (ME). The profile determines what happens in case of a measurement of verification error. Strong policies entirely halt the system in case of failure, while other ones just report errors but still continue booting. The latter is often desirable for servers in a hyperscaler setup such that the system admin can still run diagnostics on the system. A few different components are needed in a working CBnT setup. The ACM was already mentioned. The ACM is found by the hardware by a pointer in the Intel Firmware Interface Table (FIT), which itself is found via a pointer at the fixed location 0xFFFFFFC0. Other necessary components are the Key Manifest (KM) and Boot Policy Manifest (BPM), which are also found in the FIT. The chain of trust is started in the following way: the Intel ME has a fuse which holds the hash of the public key of the KM. This can either be set up with 'fake-fusing' for testing CBnT where the hash can still be changed afterwards. On production systems the hash will be permanently fused. The ACM compares that fused hash to the public key that is inside the KM, which is signed with the KM private key. The KM itself holds a hash of the BPM public key which is compared to the public key stored in the BPM. The BPM is signed with the BPM private key. The role of the BPM is to define what segments of the firmware are Initial Bootblock (IBB). The BPM contains a digest of the IBBs and as such establishes a root of trust if the digest in the BPM matches what is on the flash. More in depth info on this in intel boot guard. This is what Bootguard also did. What CBnT offers on top is the TXT functionality. The IBBs are measured into PCR0 of the TPM. Other TXT functionality like clearing memory or locking down the platform before setting up DRTM with the SINIT ACM is also provided by the CBnT ACM. See the TCG DRTM for more info on this. Merging the TXT functionality makes CBnT ACMs much bigger than BtG ACMs (256K vs 32K depending on the platform). This KM and BPM separation has in mind that there is one hardware owner, but multiple OEMs. The hardware then always gets fused with the key of the owner. Each OEM might want to roll their own firmware and has it's own BPM key. The owner then creates a KM with the OEMs BPM key hash inside it. The OEM can then generate their own BPM that matches the firmware they intend to use. KM and BPM also provide security version numbers that can be enforced. So the same hardware can have different OEMs during its lifetime. The previous OEM won't be able to generate a working CBnT image for the new OEM. The strength of a CBnT setup and the trustworthiness it provides lies in the following things:
  • the signature verification of the ACM done by the ME/Microcode (Intel)
  • ACM signing key remaining private (Intel)
  • the verification done by the ACM, which is a closed binary (it's 256K so not so small)
  • KM keys remaining private (Manufacturer)
  • OEM keys remaining private (OEM), KM security version number can be updated to make OEM keys obsolete though
  • The IBB needs continue the chain of trust which is what the next section will be about

Chain of trust

Coreboot essentially supports 2 different methods for setting up a chain of trust. You have measured boot and verified boot. Verified boot is conceptually easier grasp. Each software component that is run after the bootblock is signed with a private key. The trusted bootblock has the corresponding public key and uses that to verify the integrity of the next program. If the signature does not match the binary then the firmware can report an error to let the user know that their system cannot be trusted or the boot process can even be fully halted if that is desired. Securing your firmware using measured boot works a bit differently and involves a TPM. The idea with measured boot is that before a component is used, it is digested and the hash is stored in the extend-only PCR registers of the TPM. When the boot process is done, the user reads out the TPM and if the PCRs don't match with what you expect, you know that the firmware has been tampered with. A common use case is where the TPM can be read out remotely independent from the host. If the TPM PCR values don't match, that system won't be allowed access to the main network. The admin can then take a look at that system, fix potential issues and allow that system back online after those have been resolved. Historically Google first added verified boot to coreboot with their VBOOT implementation. Measured boot was later added as an optional feature to VBOOT. Now measured boot can be used independently from Google's VBOOT. Google's VBOOT was built with ChromeOS devices in mind. Those devices use very varying hardware: different SOCs from Intel, AMD and many ARM SOC vendors. To support all those different SOCs Google uses a common flash based root of trust. The root of trust lies in a read only region of the flash which is a feature of some SPI flash which is kept in place by holding the /WP pin low. The verification mechanism resides in the read only region and verifies the firmware in FW_MAIN_A/B FMAP partitions. The RO region of the flash does hold a full firmware for recovery. This copy of the firmware is also considered trusted. Such a VBOOT setup does not work that well with a root of trust method like CBnT/Bootguard. With Bootguard some initial parts of the firmware are marked as IBB and the ACM will verify those. It's up to the firmware and assets in those IBB to continue the chain of trust and verify the next components that will be loaded. A fully trusted recovery image in 'RO' region would need to be marked as IBB. CBnT/Bootguard were however not designed for that, as the IBBs are then too big. Only code that is required to set up a chain of trust ought to be marked as IBB, not a full firmware in 'RO' region. In more practical terms, if the bootblock is marked as IBB with Bootguard, the romstage that comes after it cannot be a romstage in the in 'RO' FMAP region as there is no verification on it. VBOOT needs to be modified to only load things from FW_MAIN_A/B. Just not populating the RO FMAP with a romstage is not sufficient. An attacker could just take a working Bootguard image and manually add a romstage in the RO cbfs. The solution is to disable the option for a full recovery bootpath in VBOOT. A note about the future: some work is being done to have per cbfs file verification. This would fit the Bootguard use case much better as it removes the need to be careful about what cannot be in the VBOOT RO region. ​Another difficulty lies in what to mark as IBB. An obvious one is the bootblock as that code gets executed 'first' (well after the ACM has run). But the bootblock accesses other assets, typically quite early in the bootflow. The CPU starts in a bare state: there is no RAM! A solution is to use CPU cache as RAM. This setup is rather tricky and the details are not always public. So sometimes you are obliged to use Intel's FSP-T to set up an environment in which you can execute C code. Calling FSP-T therefore happens in assembly and for this reason verification on the FSP-T binary cannot happen this early. Even finding FSP-T causes problems! FSP-T is a cbfs file and to find cbfs files you have to walk from bottom to top until you find the proper file. This is prone to attacks: someone can modify the image/cbfs such that other non trusted code gets run instead. The solution is to place FSP-T at an address you know at buildtime which the bootblock code jumps to. FSP-T also needs trusted so it has to be marked as IBB and verified by the ACM. Ok, now we are in a C environment but we’re are not there yet. We need to set things up such that we can verify the next parts of the boot process. For that we need the public key which lies in the "GBB" fmap partition. FMAP partitions are found via the "FMAP" fmap partition whose location is known at buildtime. So again both "FMAP" "GBB" need to be marked as IBB, to be verified by the ACM. With VBOOT there is the option to do the verification in a separate stage, verstage. Same problem here too: it's a cbfs file which can only be found at runtime. Here the solution is to link most of the verstage code inside the bootblock. As it turns out this is even a good idea for most x86 platforms using a Google VBOOT setup. You have one stage less so less code duplication. It saves some space and is likely a tiny bit faster as less flash needs to be accessed which is a slow operation. Other things are done in the bootblock like setting up a console. The verbosity of the console is sometimes fetched with board specific methods relying other parts of the flash. So again this needs to be fetched at a location known at buildtime and marked as an IBB or simply avoided or done later in the bootprocess. So the conclusion is that all assets that are used before the chain of trust setup code is run (VBOOT setup or measured boot TPM setup) need to be referenced statically, searching for them cannot be done and they need to marked as IBB with Bootguard.

Converged security suite

CSS is an open source project maintained by 9elements. It is written in go, which makes it quite portable. It's a set of tools and libraries related to firmware and firmware security. One such tool is cbnt-prov. It is integrated in the coreboot buildsystem and can properly set things up for Intel CBnT, by generating a KM and BPM. It parses a coreboot image and detects what segments need to be marked as IBB automatically. It is however not just a coreboot specific tool to glue things together for CBnT. It supports dumping information on the CBnT setup for generic UEFI images too. It can take an existing setup, turn it into a configuration file, which can be reused later on, for instance if you want to deploy the same firmware but with different keys. One last important feature is to be able to do validation on an existing image. We are working hard on an equivalent tool for bootguard that will be called bg-prov. We hope to get this ready for production soon. ​This is a big step forward in the usability of coreboot as previously you were bound to proprietary tools provided by Intel that were only accessible under NDA and has usability issues as they are Microsoft Windows executables. Coreboot is the best open source X86 firmware at this day and having fully free and open source software to cover the common use case of Intel Bootguard and CBnT makes coreboot a more attractive firmware solution. We hope that this improves its market adoption!